WATCH LIVE CRICKET


Monday, September 8, 2014

Italian Cheddar Bake (Macaroni & Cheese Casserole) Recipe

Italian Cheddar Bake (Macaroni & Cheese Casserole). Photo by BlondieItaliana

Ingredients:

Directions:

  1. 1
    Preheat oven 400 degrees. Prepare dinner as directed on package. Meanwhile, brown meat over med-high heat, drain. Add tomatoes & oregano, mix well & bring to boil.
  2. 2
    Add meat to dinner. Spoon into 2 quart casserole dish. Sprinkle with cheese.
  3. 3
    Bake 10 minute or until cheese is melted & casserole is heated through.

Bird's Famous Macaroni and Cheese Recipe

Bird's Famous Macaroni and Cheese. Photo by Andi of Longmeadow Farm

Ingredients:

Directions:

  1. 1
    Preheat oven to 350 degrees Fahrenheit. Melt butter in large saucepan over medium-high heat.
  2. 2
    Stir in flour, salt, dry mustard and pepper until smooth. Gradually stir in milk and heavy cream, stirring continuously until thickened, about 10 minutes.
  3. 3
    Remove from heat. Stir in cheeses (a little at a time) and mix until smooth and cheese has melted.
  4. 4
    In a large bowl, pour cheese mixture over macaroni, mixing well. Place mixture into a greased 9x13 baking pan. Sprinkle seasoned bread crumbs on top. Bake for 25-30 minutes.

Installing SQL Server Management Studio 2008 Express after Visual Studio 2010

One of the first things I always do after installing Visual Studio is to install SQL Server Management Studio (SSMS). Visual Studio 2010 installs SQL Server 2008 Express on your machine but doesn’t include SSMS. Although you can use Visual Studio to create/connect/design databases, I like having SSMS around for advanced management. I recall SSMS for SQL Server 2005 was a simple install, unfortunately they threw the kitchen sink into the SSMS 2008 installer and I’m always confused at which buttons I need to push to get it to do what I want. So I’m writing up this blog post for two reasons 1) So I remember the steps and 2) So you can be less frustrated :-) (BTW, a birdie tells me that the SQL team is looking at making this installer much simpler in the future. Hooray!)
Okay the first thing you need is to make sure you get the right version of SSMS. If you installed Visual Studio 2010 then you will need the 2008 version (not R2).
STEP 1: Download Microsoft® SQL Server® 2008 Management Studio Express and select either SQLManagementStudio_x64_ENU.exe or SQLManagementStudio_x86_ENU.exe depending on your machine’s OS bit-ness. I’m running Windows 7-64bit so I’ll be detailing the steps as it pertains to that OS.
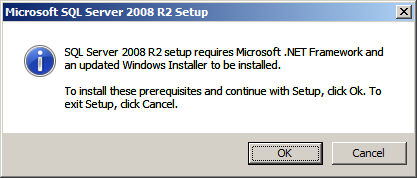
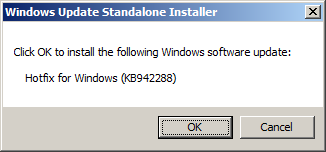
STEP 2: Make sure you’re logged in as an administrator of the machine then right-click on the exe you downloaded and select “Run as Administrator”. If you’re on Windows 7 then you’ll get a compatibility warning. Click past it for now to continue with the install. Later you’ll need to apply SQL 2008 Service Pack 2.
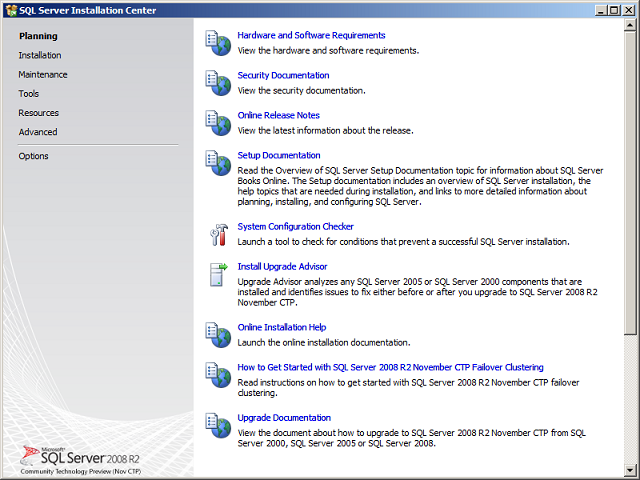
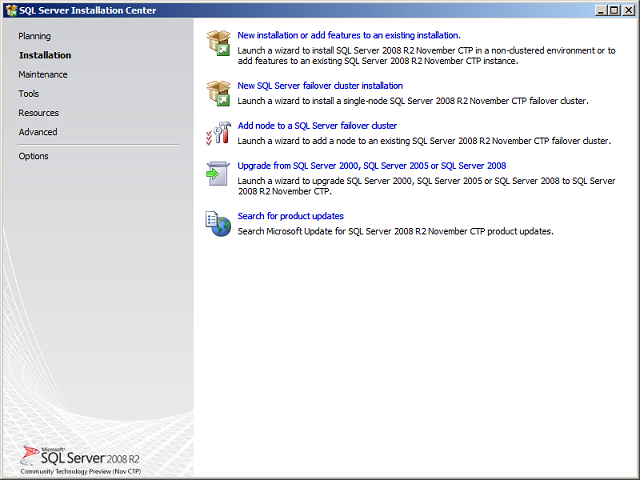
STEP 3: You should now see the “SQL Server Installation Center” window. Yes it looks scary. Select the “Installation” tab.
image
STEP 4: Select “New SQL Server stand-alone installation or add features to an existing installation”. It will then run a rule check. Make sure there are no failures and then click OK.
image
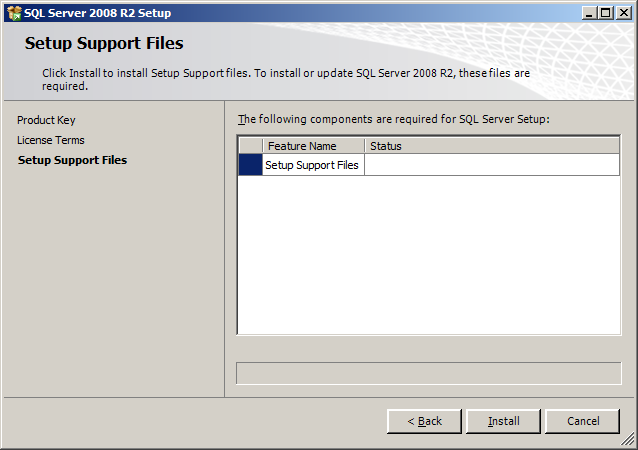
STEP 5: The next step is misleading. The Setup Support Files window looks like it’s doing something and stuck on “Gathering user settings.” It’s actually waiting for you to click the Install button! Doh!
image
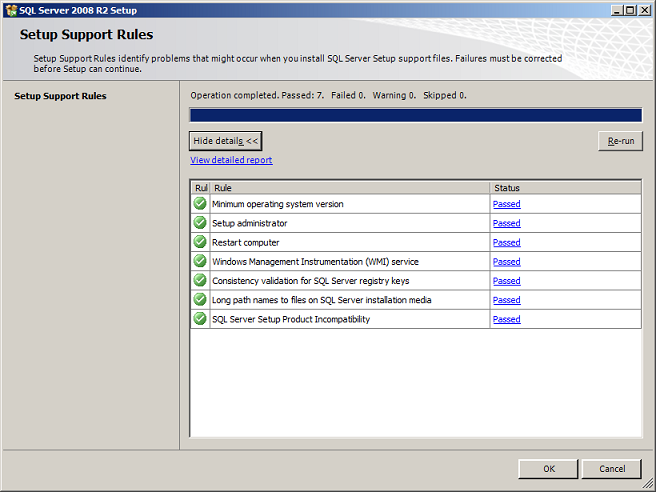
STEP 6: Another rule check. You’ll probably end up with a Windows Firewall warning this time. If you want to enable remote access to SQL Server you’ll need to configure the firewall later. Since I’m using SQL Server Express for development purposes on this machine only, I won’t need to worry about that. Click Next.
image
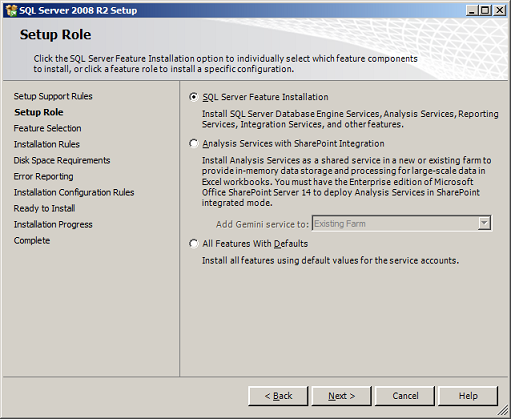
STEP 7: Okay here is the step I always mess up because it’s just not intuitive at all. On the Installation Type window you have a choice between “Perform a new installation of SQL Server 2008” OR “Add features to an existing instance of SQL Server 2008”. You need to select new installation, NOT add features. I know I know, totally weird. You would think that since you just want to add SSMS that it would be Add features to existing instance – I mean I don’t want a new instance, just the dang tools. Sigh. Click Next.
image
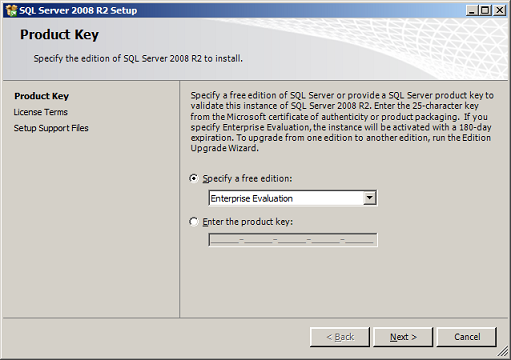
STEP 8: Next you get the Product Key window. You obviously don’t need a product key for SQL Server Express since it’s free so just click Next.
image
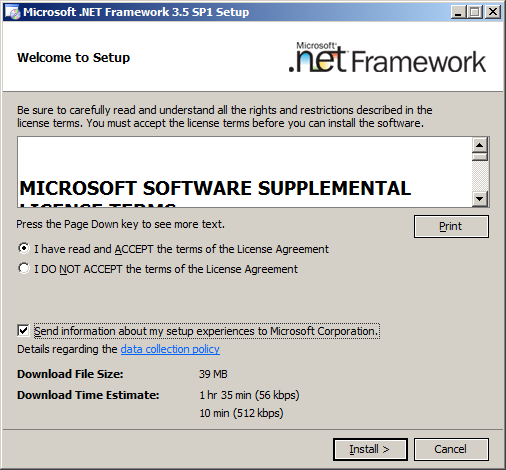
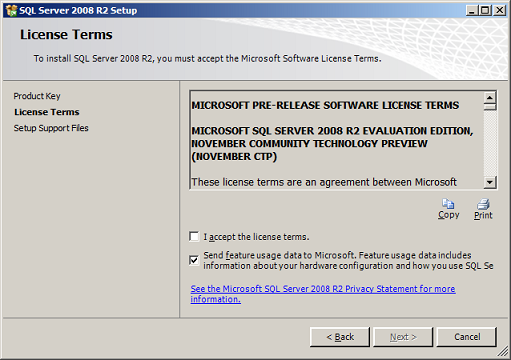
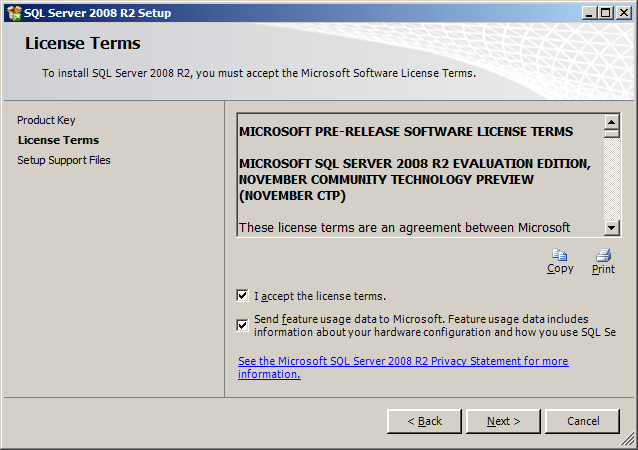
STEP 9: Accept the License Terms and click Next.
image
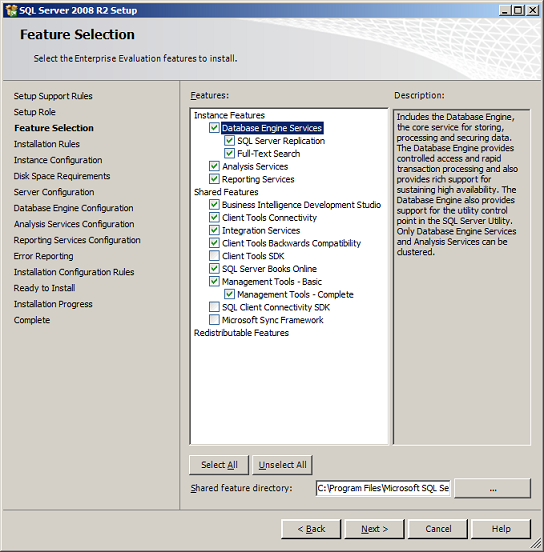
STEP 10: Okay now for the window we’ve all been waiting for - Feature Selection. Check off “Management Tools – Basic” and then click Next.
image
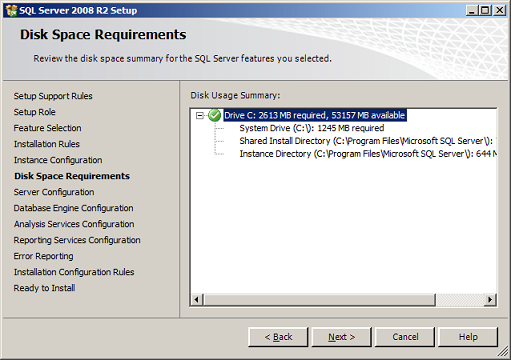
STEP 11: Verify your disk space requirements and click Next.
image
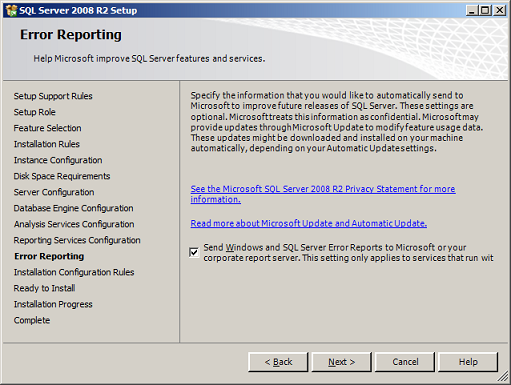
STEP 12: Help Microsoft improve SQL Server features and services by selecting to send usage and error reports to them (or not). Click Next.
image
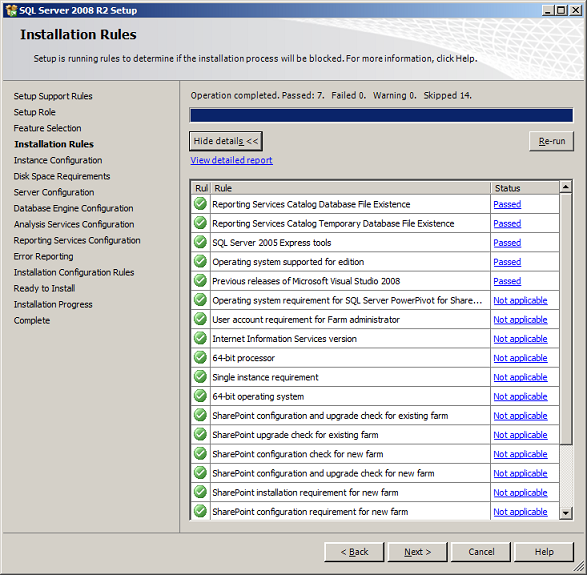
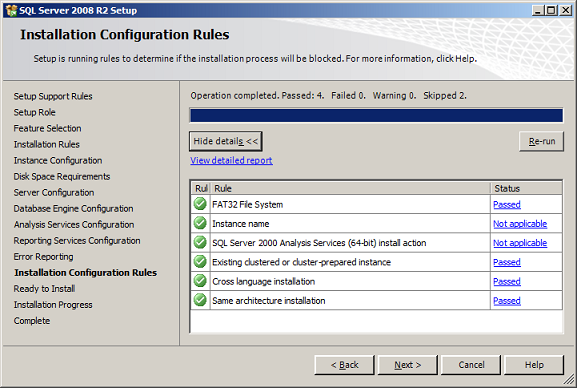
STEP 13: Another quick rule check runs. Click Next.
image
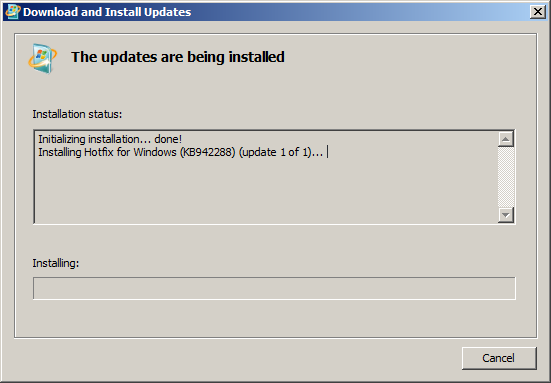
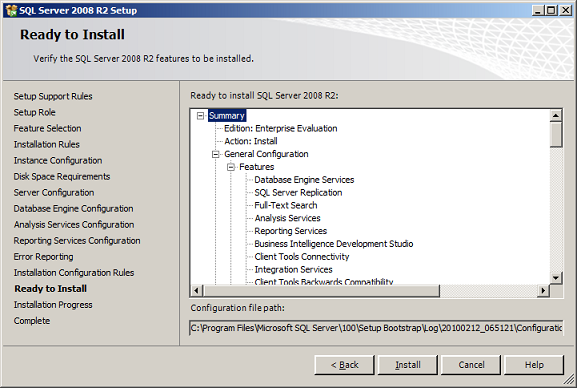
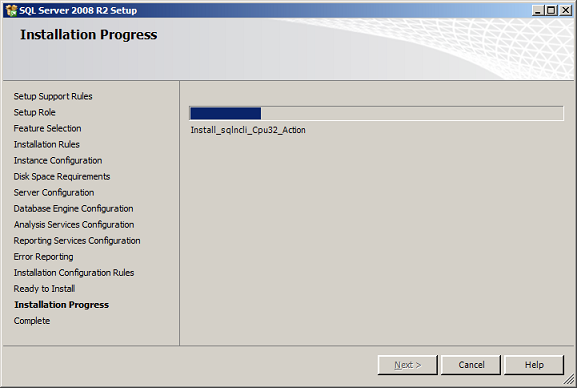
STEP 14: Now it looks like we’re ready to install. Click the Install button.
image
The install will kick off and will take about 5 minutes to complete.
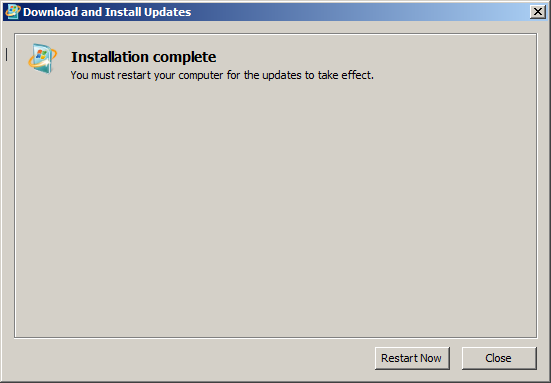
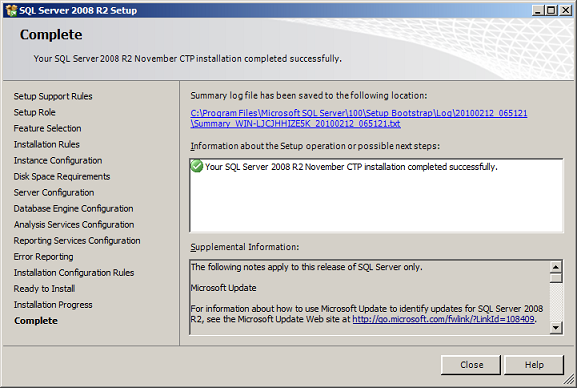
STEP 15: Once the installation completes, click the Next button again.
image
STEP 16: Complete! Click the Close button and you should be all set.
image
STEP 17: Fire up SQL Server Management Studio! You should now see it in your Programs under Microsoft SQL Server 2008. Make sure you run it as an administrator for access to all the features.
image
And don’t forget at some point to install the latest SQL Server 2008 Service Pack.

How to install SQL Server 2008 R2

The following are software requirements:
bullet.Net Framework 3.5 SP1 is needed.
bulletWindows Installer 4.5 or later is required.
bulletInternet Explorer 6 SP1 is required.
bulletFor operating systems requirements, please click here. Windows Web Server and Windows Server 2008 Standard do not have the failover cluster feature available.
bulletPowerShell is required for SQL Server Express with Advanced Services.
bulletIf you have Visual Studio 2008 installed on the computer where you are planning to install SQL Server R2, please install Visual Studio 2008 SP1 prior to run SQL Server setup.

The hardware requirements are:

bulletAt least 2.0 GB of available hard disk space
bulletSupported Operating Systems: Windows Server 2008 ; Windows Server 2003 Service Pack 2; Windows Server 2003 Small Business Server R2; Windows Vista; Windows XP Service Pack 2
bullet1024 x 768 video resolution.
bulletFor processor and memory requirements,

Run SQL Server 2008 R2 setup. First, setup checks to determine software requirements are installed. If not, you will be prompted to install.


As mentioned above, SQL Server 2008 R2 requires Windows Installer 4.5 and .Net Framework 3.5 SP1 to be installed. Click OK button to install .Net Framework.


After installing .Net Framework 3.5 SP1, I was prompted to install Windows Installer (KB942288).


After installing the hotfix, the Installation Center will launch.


On the screen above, make a click on the "Installation" hyperlink in the left side of the screen.


This screen shows the types of installation available.  Let's select the first type available "New SQL Server stand-alone installation or add features to an existing installation".


Above you will find the first set of Setup Support Rules. The Next button is available only if all check results are successful, or if failed checks do not block installation


On the page above, specify the edition of SQL Server to install.  We chose the Enterprise Evaluation Edition.


The above is the License Terms page.  Read the license agreement and if you agree with it, check the "I accept the license terms" check box, and then click the Next button.


On the following page, setup is installing a required component.


The following is a new page on SQL Server setup, its name is Setup Role. Here you have three options:
bulletChoose "SQL Server feature installation" to install SQL Server Database Engine, Analysis Services, Integration Services, Reporting Services.
bulletChoose "Analysis Services with SharePoint Integration" if you want SQL Server setup to add PowerPivot for SharePoint to a SharePoint farm.
bulletChoose "All Features With Defaults" to install all features of SQL Server in one box.


On the Feature Selection page, select the features for your installation.


The page below belongs to the second set of Setup Support Rules.


On the Instance Configuration page, select a default or named instance for your installation, and select de directory where you want to install de features you have chosen.


This page is just for the purpose of reviewing disk usage.  Click on the "Next" button to continue setup.


It is recommended to create a local user or domain user account to start SQLServer services, the next page setup will display is all about SQL Server service accounts.

If the computer is not part of a domain, use a local user account without Windows administrator permissions. You can create this account using Control Panel -> User Accounts.

Use a Domain User Account if the service must interact with network services or access domain resources. This account should be pre-created by a domain administration in your environment.
Whether you create a local user or a domain user account, the password you use to create the account must be a strong password.

You can also use built-in accounts as the NetworkService account, but I would not recommend to use Local Service Account for SQL Server (MSSQLSERVER). Use Local System if you need a very high-privileged account. It has extensive privileges on the local system.


Microsoft recommends you to specify an individual account for each service. The service accounts used for this configuration must have a strong password as mentioned above, otherwise you will get the error "Invalid or missing username or password. To continue, provide valid credentials for the SQL Server Agent service".  A strong password  is one that has a combination of letters in uppercase, lowercase, numbers and special characters.


On the Collation tab, specify the collation for your SQL Server instance.


On the Database Engine Configuration page, choose the authentication mode to use for your SQL Server installation.

Enter and confirm the password for the (sa) login when you choose Mixed Mode Authentication.


If you are planning to use FILESTREAM with SQL Server 2008 R2, you may want to enable it on this tab or do it later.


On this page, provide user account that will be Analysis Services administrators.


If you selected Reporting Services as a feature to install, the Report Services Configuration page is displayed.   Here we chose to install Reporting Services on Native mode.


On the Error and Usage Reporting page, optionally clear each check box to disable error reporting.


The above screens belong to the Installation Configuration Rules.


On the Ready to Install page, review the summary of features and components for your SQL Server installation. To proceed, click Install.


On the Completing the Microsoft SQL Server Installation click Close.